


RWA Handcrafted Straight Edge Floating Shelf, Solid Elm with Pearl Epoxy, 12 x 6 in – Wall-Mounted Wood Shelf with Hidden Brackets, One-of-a-Kind Luxury Wall Décor for Bathroom, Living Room, Office

 4.4 (74 items)
 Limited Time Sale
US$95.40 cheaper than the new price!!
Free cash-on-delivery fees for purchases over $99
Product details
| Management number | 212985354 | Release Date | 2026/04/12 | List Price | US$63.60 | Model Number | 212985354 | ||
|---|---|---|---|---|---|---|---|---|---|
| Category | |||||||||
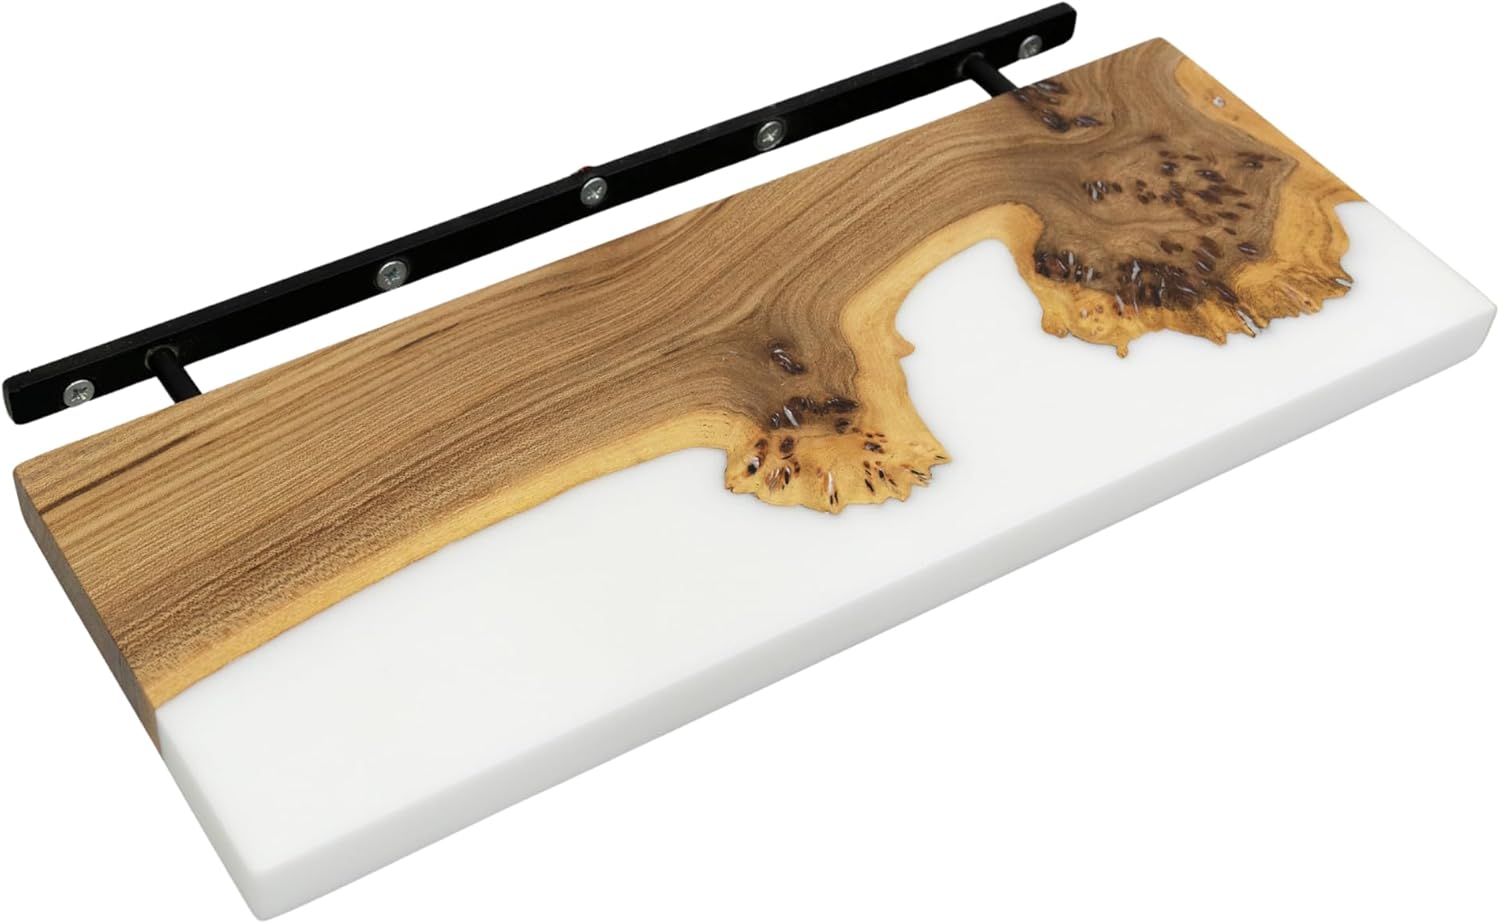
- 🌳 Handcrafted Premium Wood Shelf with Pearl White Accent – Artisan Luxury, One of a Kind (pearl white epoxy, 12 x 6 inches): Individually handcrafted from high-quality solid hardwood and finished with a refined pearl white epoxy, this straight-edge floating shelf highlights natural grain, depth, and artisanal detail. No two shelves are alike, making each piece a unique statement of craftsmanship and understated luxury — ideal for customers seeking distinctive, high-end white floating shelves.
- 🛠️Pearl White Floating Shelf with Hidden Brackets – Strong, Refined Support: Premium floating wall shelf engineered for stability and long-term performance. Supports up to 22 lbs (10 kg) when properly mounted and includes concealed brackets and complete mounting hardware for a flawless, gallery-style floating appearance. Designed for premium quality and lasting performance in your home.
- 🎨 Unique Straight Edge Design – Versatile for Any Room: Each shelf is one-of-a-kind, showcasing the natural solid wood combined with epoxy accent. Perfect as a floating shelf for living rooms, bedrooms, home offices, hallways, dining rooms, or studies, adding character and elegance while maintaining clean, contemporary lines.
- 🛁 Moisture-Resistant for Bathroom & Kitchen Use: Sealed pearl white epoxy surface helps protect against humidity and moisture, making this shelf suitable as a bathroom wall shelf, kitchen floating shelf, or wall-mounted shelf in humid spaces when used within the recommended weight limit.
- 🏡 Decorative Storage & Functional Display Shelf: Perfect for displaying plants, books, candles, collectibles, or framed photos. Complements modern, rustic, minimalist, and Scandinavian-inspired interiors. Use as a pearl white floating shelf for décor, a bedside wall shelf, or compact storage solution.


| Size | Small - 12x6" |
|---|---|
| Color | Pearl White |
| Shape | Rectangular |
| Set Name | Small - 12x6 |
| Room Type | Bathroom, Dining Room, Hallway, Living Room, Office |
| Brand Name | RWA resinwood.art |
| Item Depth | 1.2 inches |
| Shelf Type | Floating Shelf |
| Style Name | Straight Edge |
| Unit Count | 1.0 Count |
| Finish Types | Varnished |
| Manufacturer | RWA resinwood.art |
| Model Number | DCR.0115.018 |
| Product Name | Floating Shelf |
| Material Type | Elm Wood, Epoxy |
| Mounting Type | Wall Mount |
| Item Dimensions | 6 x 12 x 1 inches |
| Number of Items | 1 |
| Shelf Thickness | 1 Inches |
| Weight Capacity | Maximum weight: 22 Pounds |
| Furniture Finish | Epoxy |
| Installation Type | Wall-mounted |
| Number Of Shelves | 1 |
| Required Assembly | Yes |
| Additional Features | Durable, Moisture Resistant, Space Saving |
| Included Components | Brackets, Hardware |
| Shelf Bracket Shape | Straight |
| Weight Capacity Maximum | 22 Pounds |
| Manufacturer Part Number | straight shelf - platinum - small |
| Item Dimensions D x W x H | 6"D x 12"W x 1"H |
| Product Care Instructions | Wipe with Damp Cloth, Wipe with Dry Cloth |
| Specific Uses For Product | Books, Decorative Items, Liquor, Plants, Toiletries |
| Recommended Uses For Product | Bathroom Decor, Home Decor, Office Decor, Room Decor |
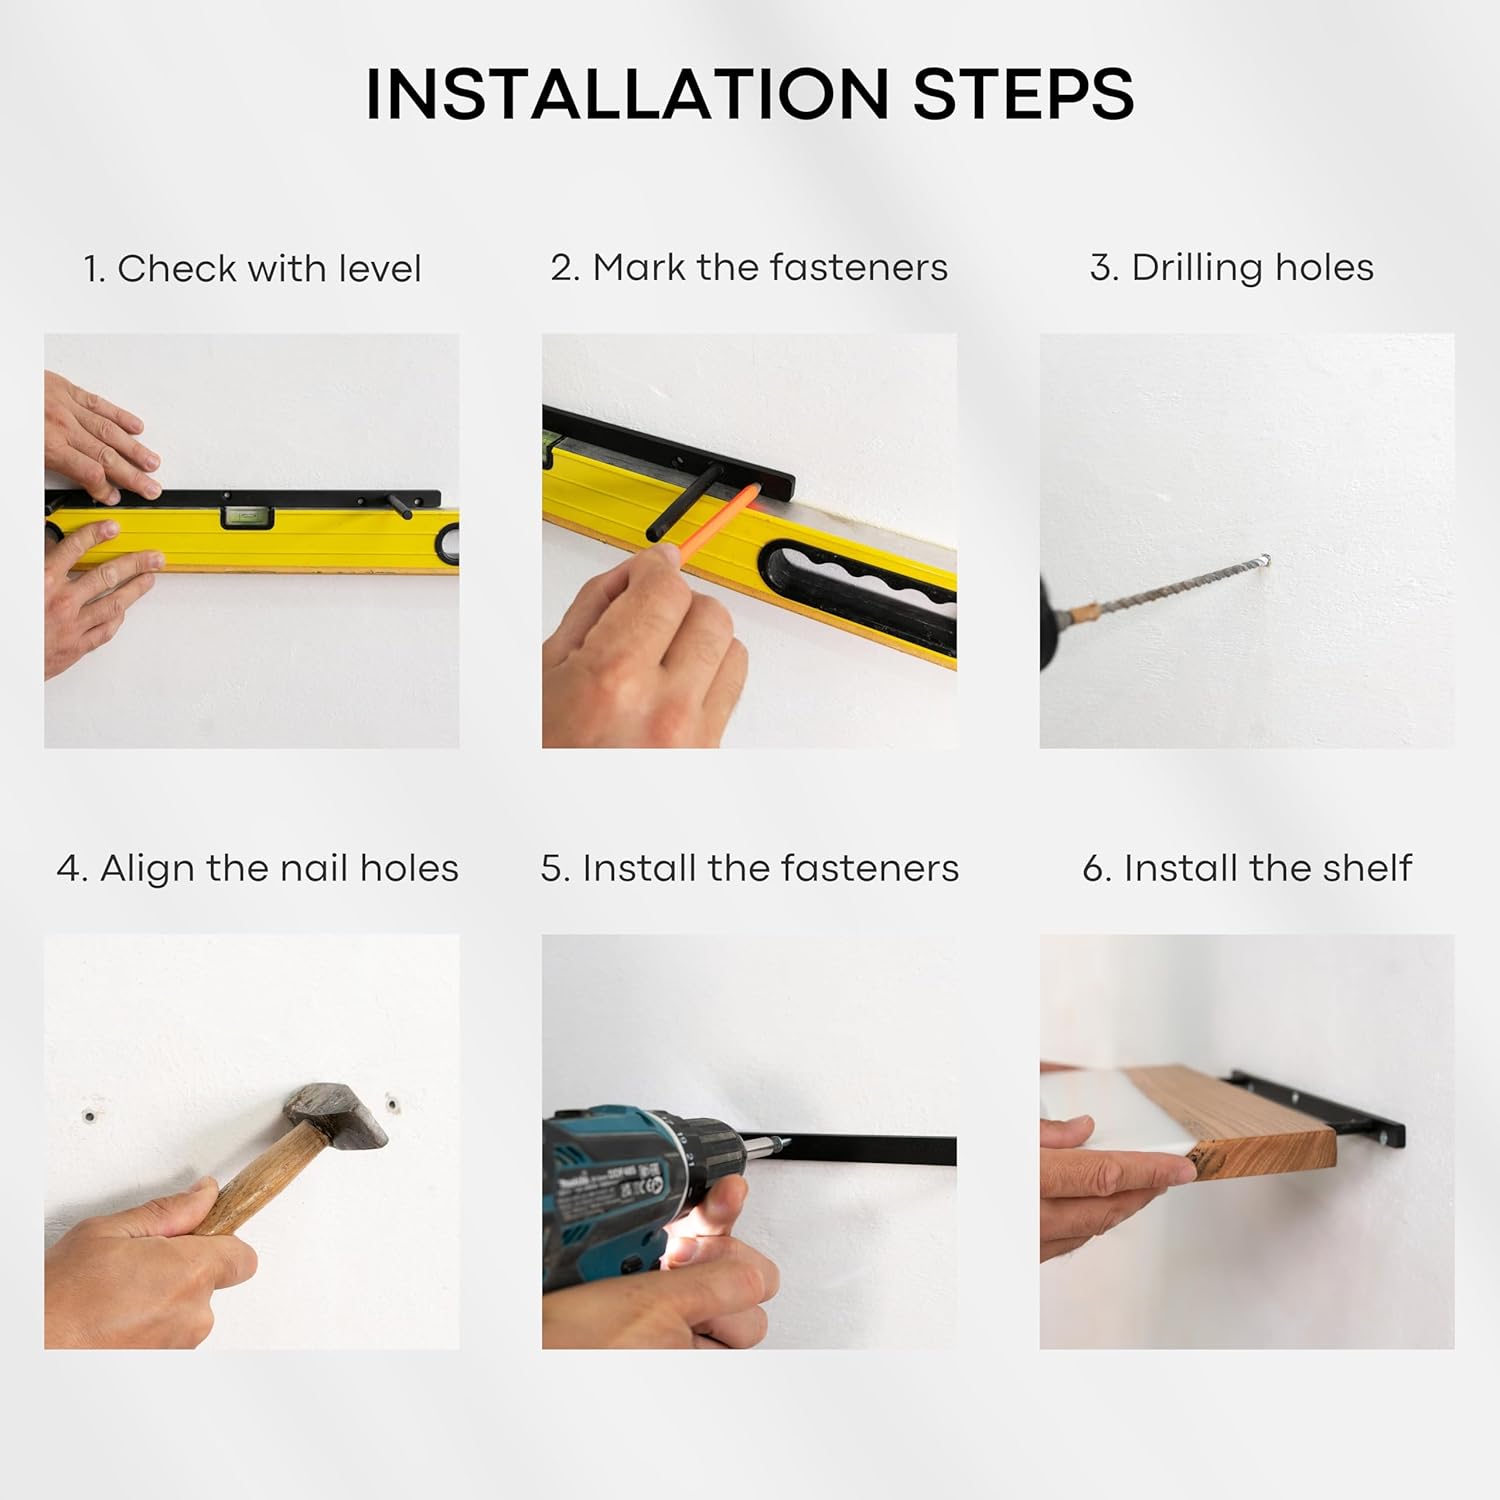
| Assembly Instructions Description | Floating Shelf Installation Guide IMPORTANT Before installation, remove the metal brackets from the side of the shelf. They are inserted for shipping and must be taken out so they can be mounted to the wall first. Tools Needed: Drill Level Pencil Hammer (if using wall anchors) Screwdriver or drill driver Installation Steps 1. Remove the Brackets Carefully pull the metal brackets out of the side of the wooden shelf and set them aside. 2. Position & Level Hold the brackets against the wall in the desired location. Use a level to ensure they are perfectly straight. 3. Mark the Holes Mark the screw hole locations on the wall with a pencil. 4. Drill Drill holes at the marked points. If installing into drywall, insert wall anchors using a hammer. 5. Mount the Brackets Align the brackets with the drilled holes and securely screw them into place. 6. Install the Shelf Slide the metal rods back into the holes on the side of the wooden shelf. Push the shelf in firmly until it is fully seated and stable. Your shelf is now ready to use! |
Bestseller ranking
Floating Shelves


Correction of product information
If you notice any omissions or errors in the product information on this page, please use the correction request form below.
Correction Request Form